Live System Installation
→ → Live system installation
Guide through the process of installing PureOS from live instance
Pre-installation steps
- Start the live PureOS instance from a USB you have prepared.
- Choose option 1 (Start live PureOS) at the PureOS boot prompt and wait for the GNOME desktop to fully start.
- When GNOME desktop is started, finish the PureOS Initial Setup procedure.
- Follow the steps below:
Simple installation
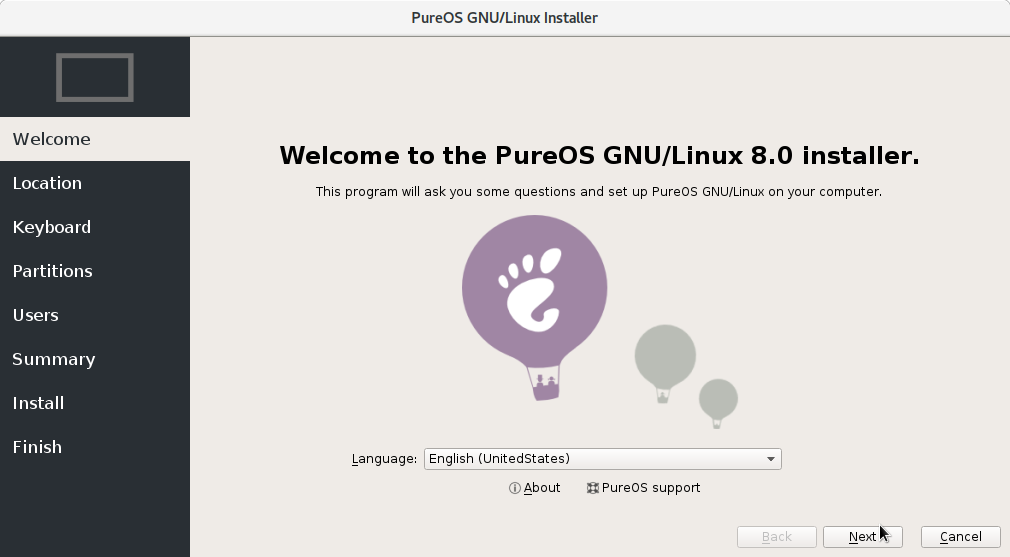
- Start the Calamares installer:
- Ensure that you are connected to the power supply and the internet, and click Next:
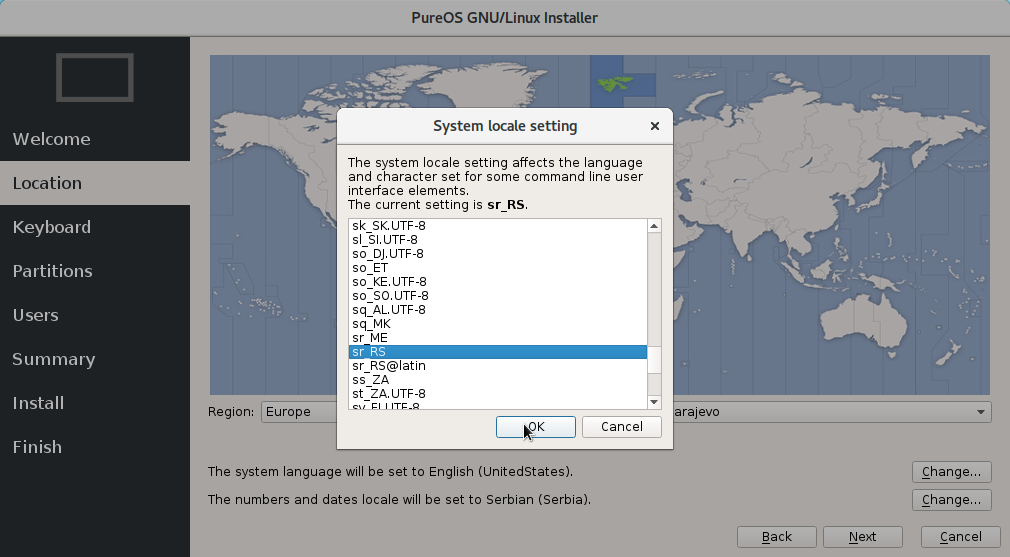
- Choose your time zone, set the system language and number and date locale:
- Select your keyboard layout:

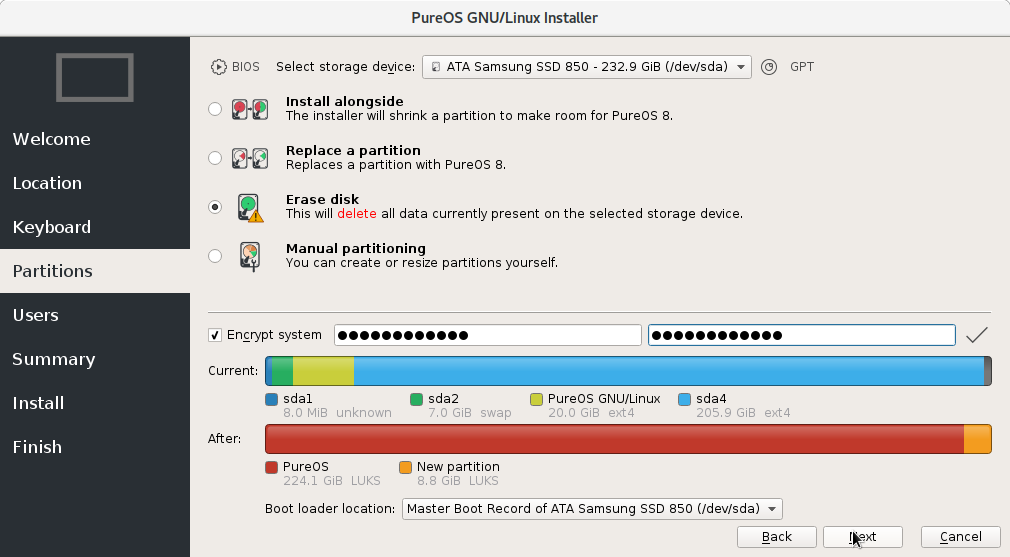
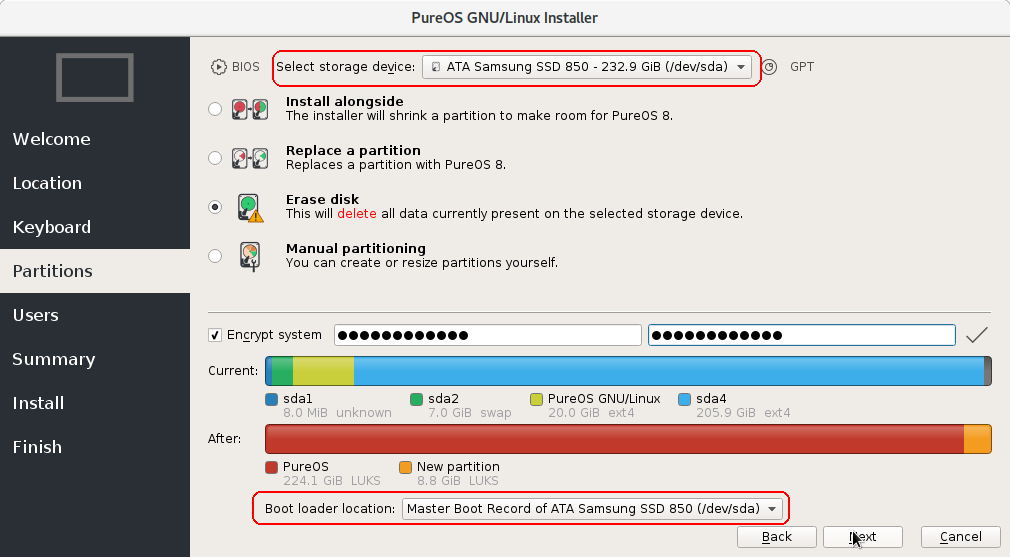
- Disk partitioning. Assumed is that your disk is blank. Choose automatic partitioning (Erase disk option), the installer will automatically partition your disk. Type-in the password you wish to use for the full disk encryption. Leave it out if you do NOT want disk encryption:
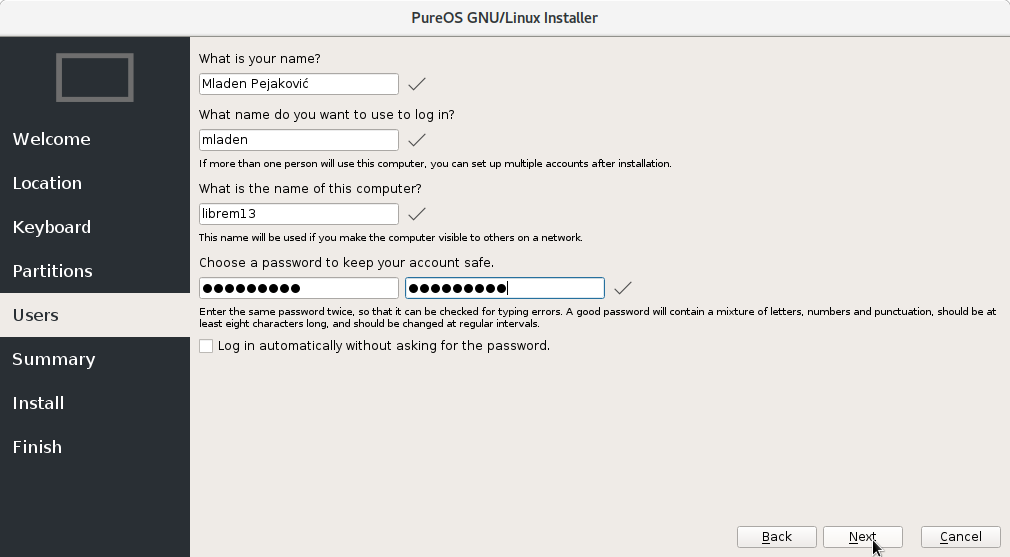
- Create a user:
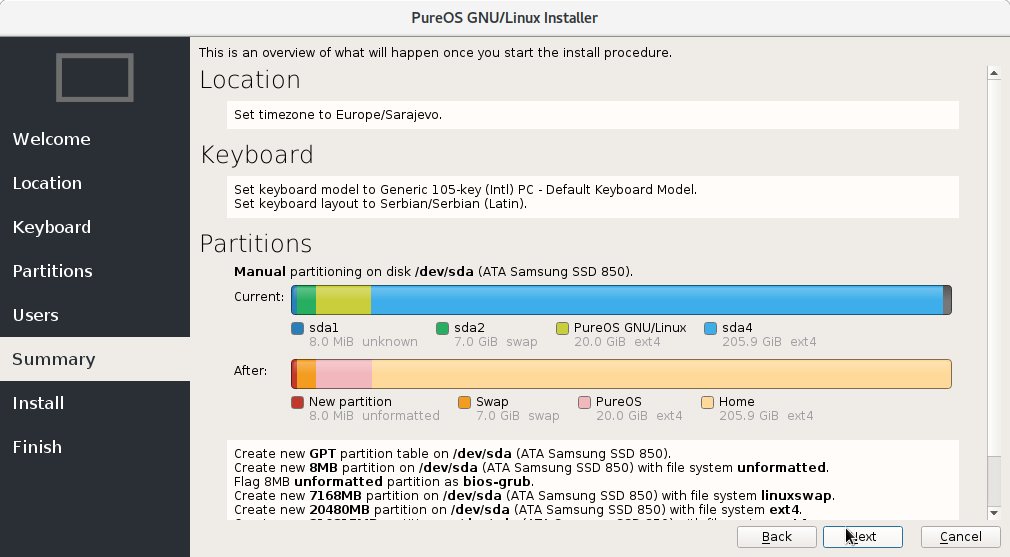
- Review install instructions:
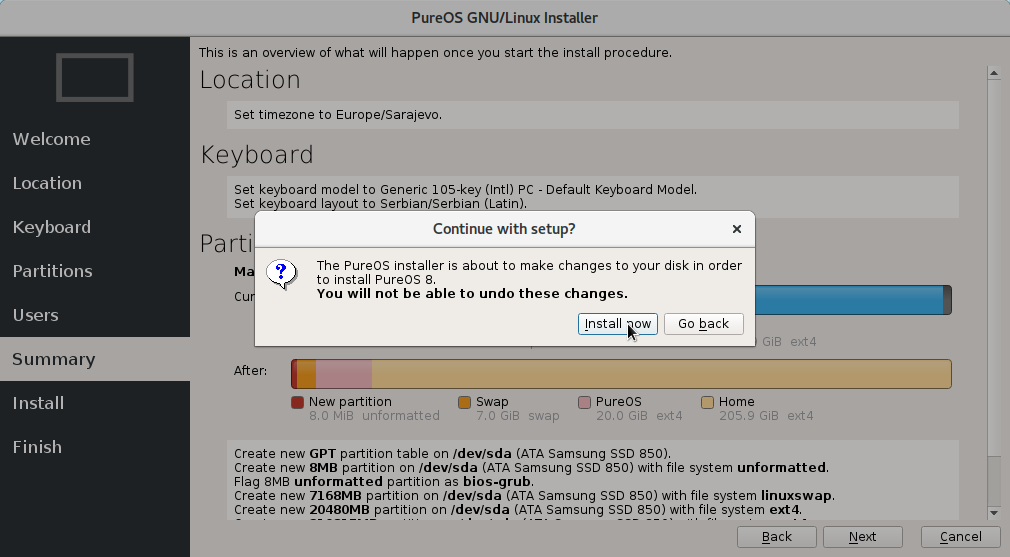
- ...and confirm the installation:
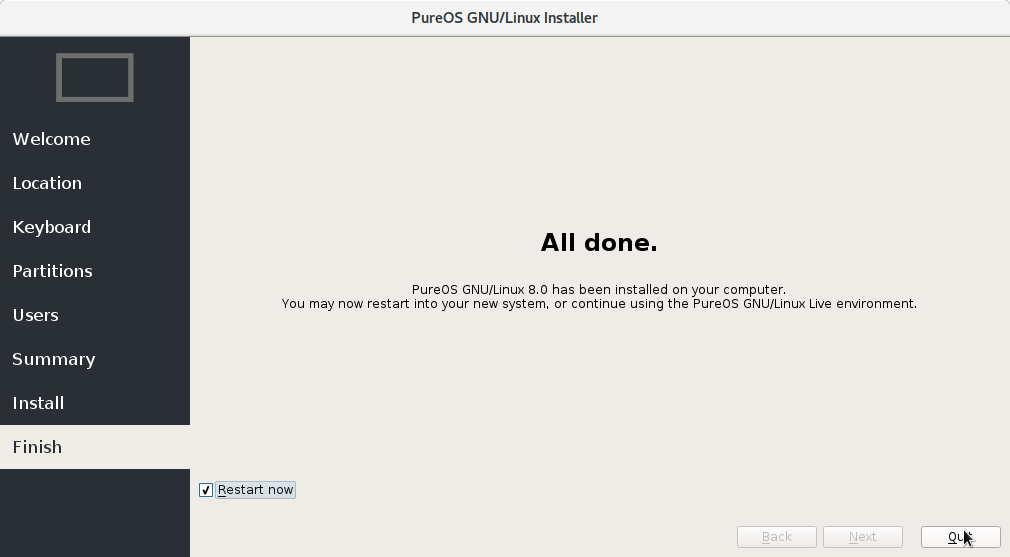
- Wait for few minutes:

- And restart after it is done.
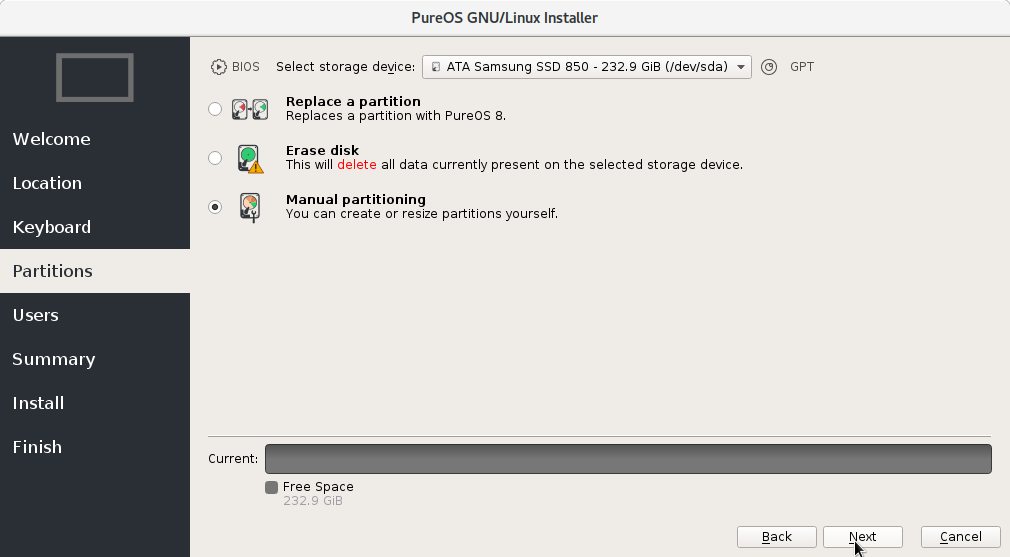
Advanced installation
Follow steps 1-4 from Simple install.
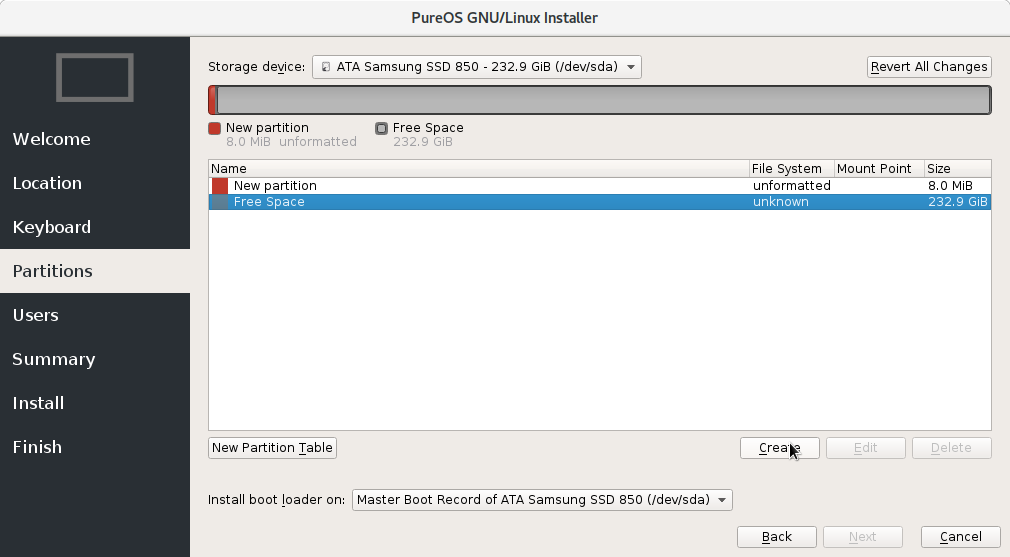
- Select Manual partitioning:
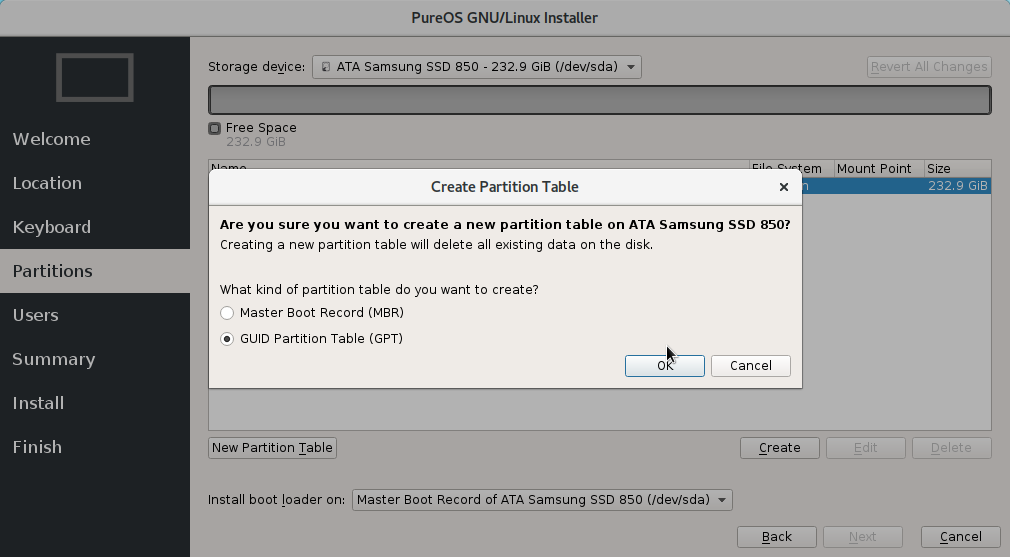
5a. First, click New Partition Table to create new partition table:

5b. ...and select GPT (click OK to accept):
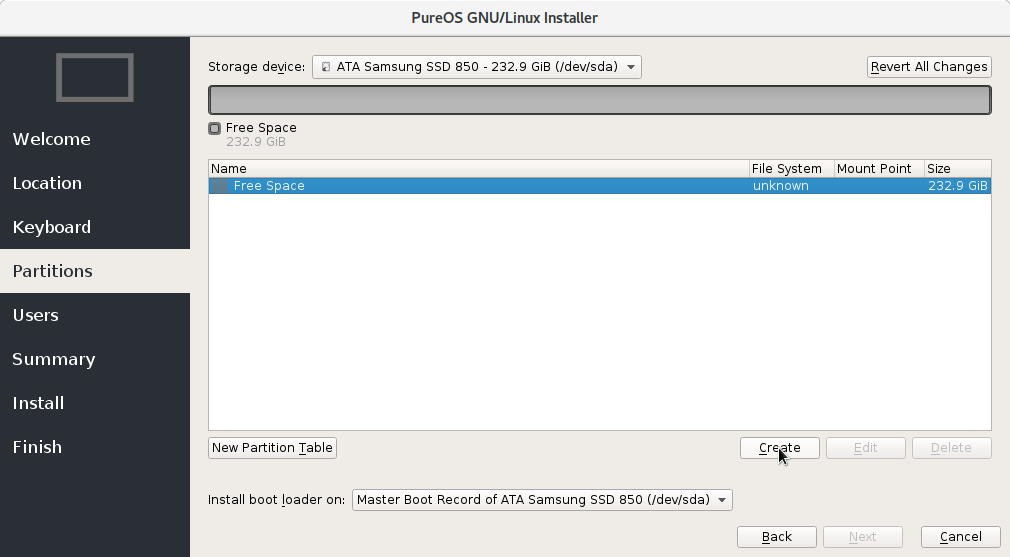
5c. Now click on free space and click Create to create first partition:
5d. Since we used GPT partition table, we need to create a partition with special flag. It can be of minimum size, so set the 1 MB size (installer might increase this value to something like 8 MB, ignore this), set File System to unformatted and select bios-grub flag (this is important). Click OK afterwards:

5e. Click on Free Space and then the Create to create next partition:
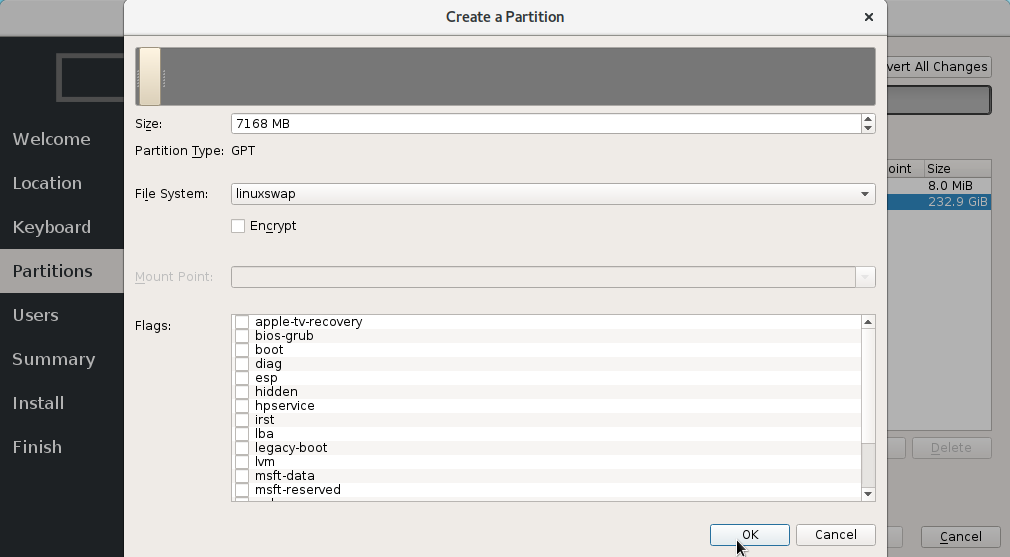
5f. In this example, swap partition is created next. Swap is needed for proper hibernation, and since the system has 8 GB of RAM, the size here is set to 7168 MB (7 GB). If your system has more RAM, make this partition larger. Choose linuxswap as file system:
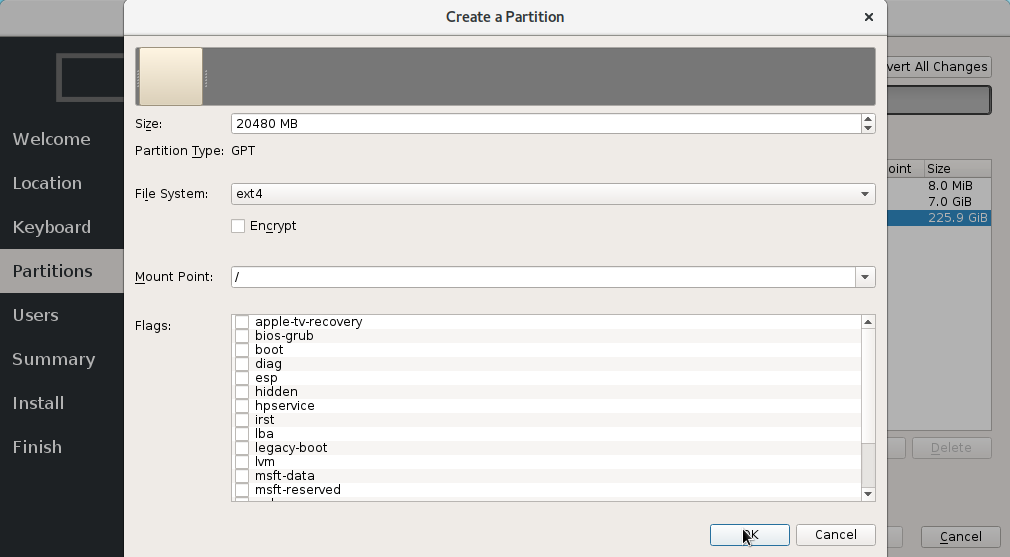
5g. Next, create root partition (place where your system is going to be installed). In the example here the size is set to 20 GB. You can set it larger if you plan to install a lot of sotware. Choose ext4 as filesystem, as it is the most stable and most tested. Don't use btrfs on your production builds! Set / for mount point:
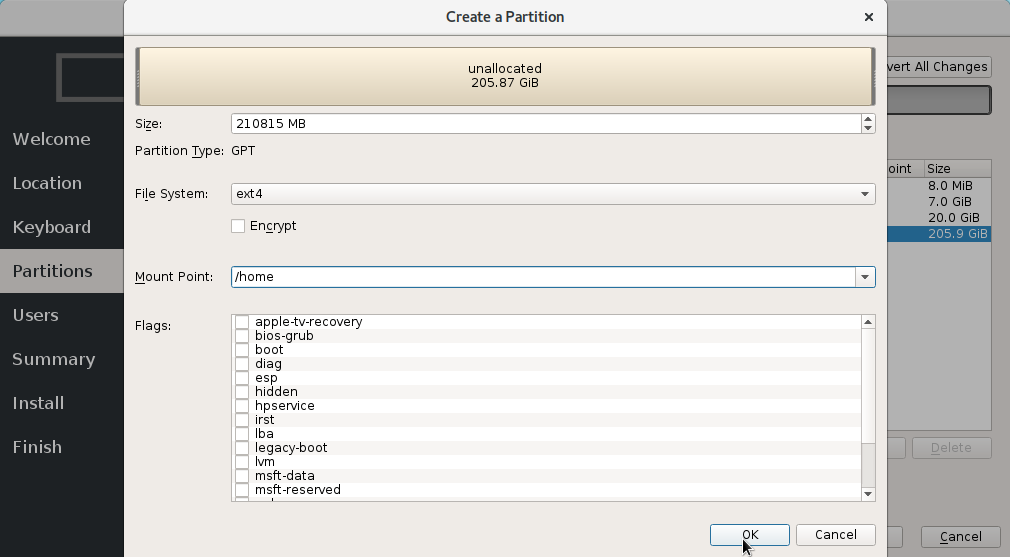
5h. Create the home partition. This is the place where your data will reside. Use the rest of disk space. Set /home for mount point:
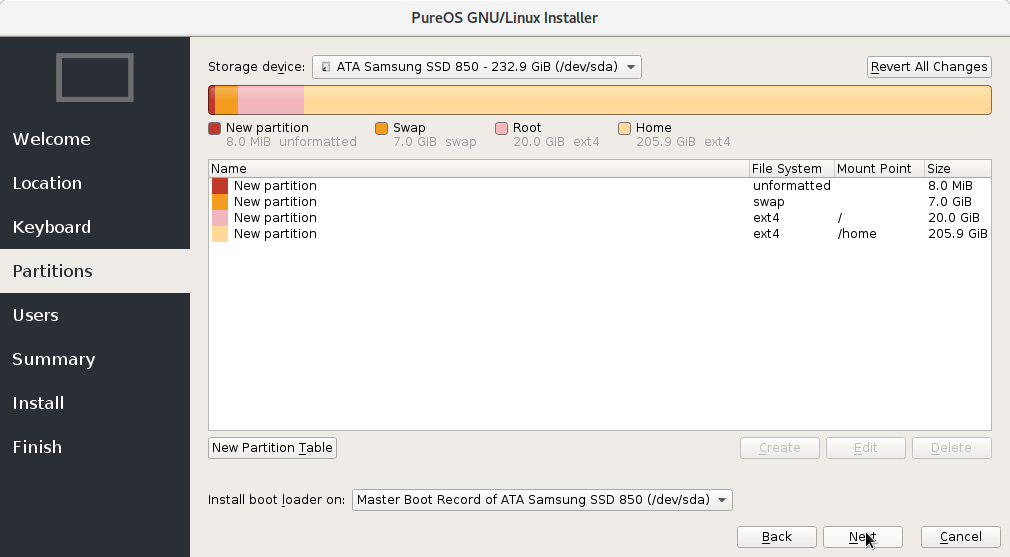
5i. Review your partitioning:
Follow steps 6-10 from Simple install.
- Last Author
- mladen
- Last Edited
- Feb 2 2019, 07:25